The manufacturer recommends inspecting and, if necessary, changing the timing belt at 160,000 km or after eight years.
The labor time is 2.9 hours.
Tip: Replace the tensioning pulley and water pump at the same time as changing the timing belt. Although the water pump is driven by the multi V-belt rather than the timing belt, in this engine it is mounted behind the timing belt drive, and the timing belt tensioning pulley is attached to the water pump. Should the water pump fail later, the entire change procedure has to be repeated using new parts since Ford has forbidden the continued use of used timing belts in this case. It is essential, therefore to change the water pump as part of the package in order to avoid later failures with unnecessary costs.
Fitters need the following special tools for the procedure:
1. Camshaft locking tool - OE (303-1097)
2. Crankshaft locking tool - OE (303-748)
3. Flywheel locking tool - OE (303-393)
4. Flywheel locking tool - OE (393-393-02)
5. Counterhold - OE (205-072)
6. Tensioning pulley fixing stud - OE (303-1054)
Preparatory work:
Identify the vehicle using the engine code.
Disconnect the vehicle battery. Do not turn the crankshaft and camshaft once the timing belt has been removed. Turn the engine in the normal direction of rotation (clockwise) unless otherwise specified.
Turn the engine only at the crankshaft pulley and not at other sprockets.
Comply with all the manufacturer's tightening torques. Jack up and prop the front of the vehicle so that the front engine mount is not under strain.
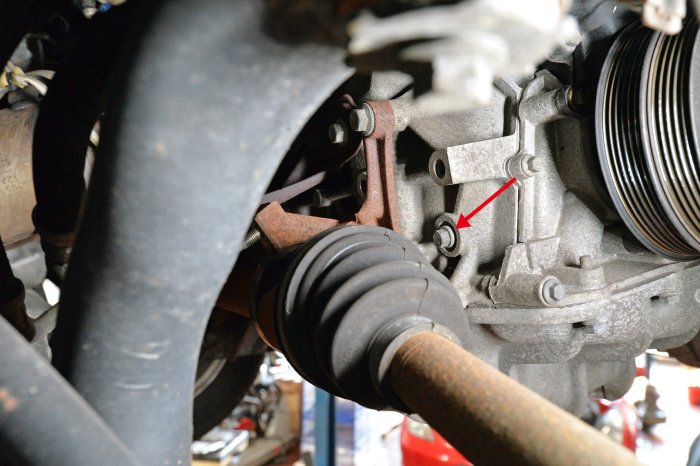
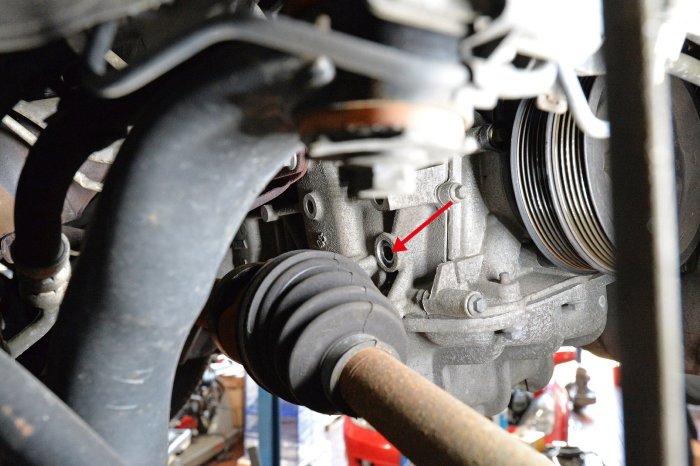
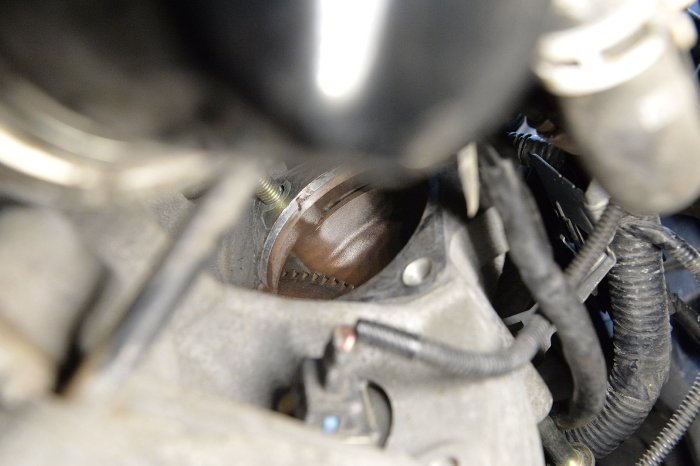
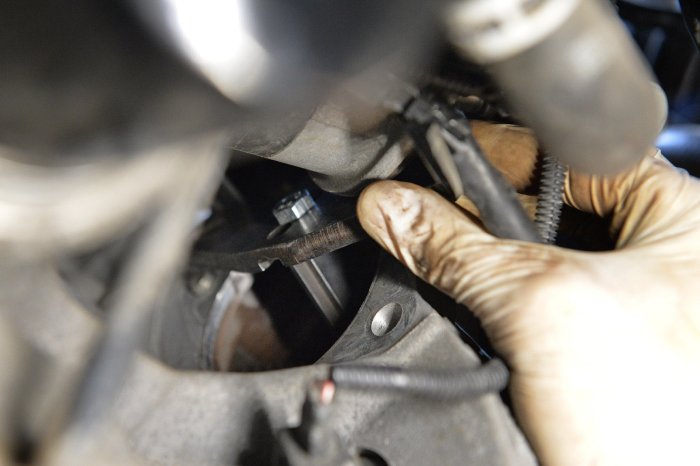
Removal: Remove front right wheel and fender shield, power steering reservoir (do not detach hoses) and alternator, ancillary unit belts (these are elastic belts!). To remove, cut with a knife or diagonal cutting pliers or remove using special strap from ContiTech Uni-Tool Elast kit. Detach cowl, starter motor, multi-plug connector from power steering pressure switch, coolant expansion reservoir (hoses do not need to be detached), water pump belt pulley, right engine mount and bracket and then remove upper timing belt guard, cylinder block screw plug for holding crankshaft (to do so, remove drive shaft bearing block (Figs. 1 and 2) and fit engine support beam or support engine.
Removal - camshaft belt:
1. Set valve timings to mark shortly before TDC of 1st cylinder until marks on camshaft sprockets are at 11 o'clock. Slot mark can be seen on exhaust camshaft sprocket and dot mark on intake camshaft sprocket.
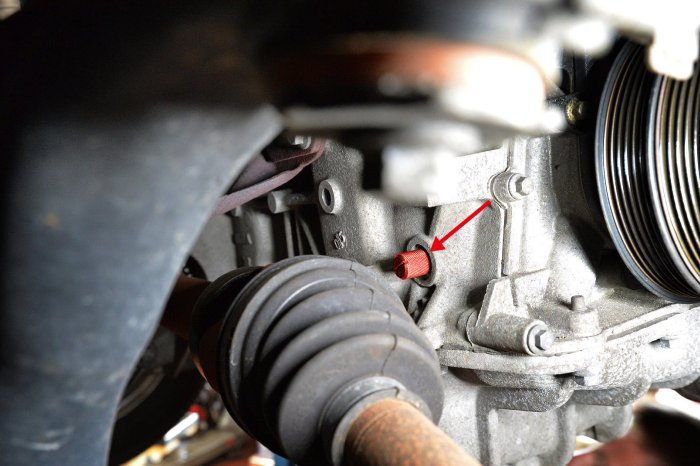
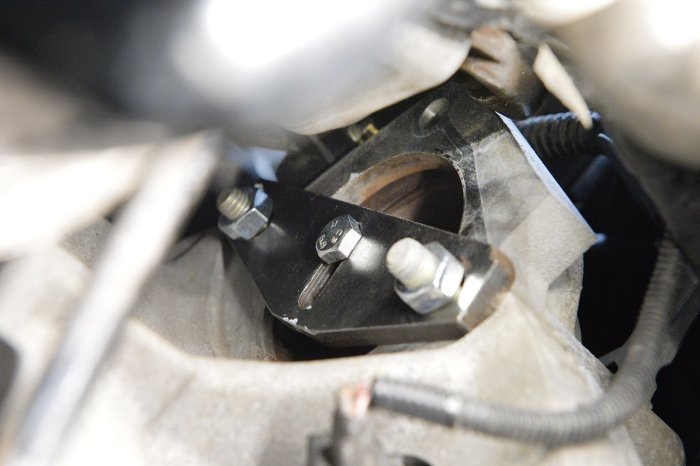
2. Insert crankshaft locking tool - OE (303-748) into cylinder block (Fig. 3) and then slowly continue turning crankshaft clockwise until crankshaft is in contact with tool. Two marks on camshaft sprockets must now be at 12 o'clock.
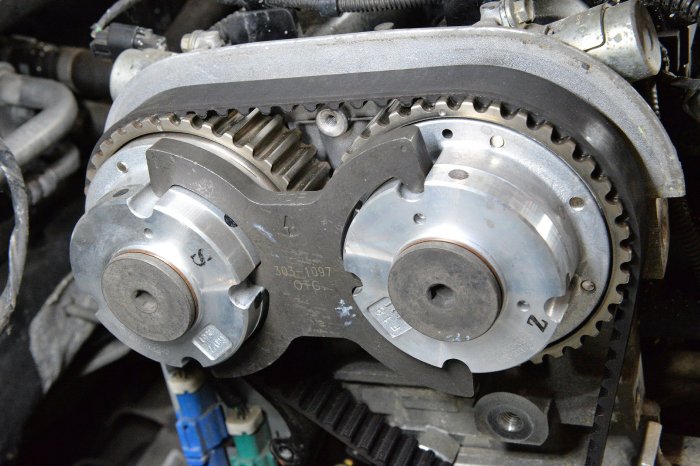
3. Locate camshaft locking tool - OE (303-1097) on camshaft. Mark on camshaft sprockets must be aligned with outer edge of camshaft locking tool (Fig. 4).
4. Insert flywheel locking tool - OE (303-393 and 303-393-02) into starter motor opening (Figs. 5, 6 and 7).
5. Then remove crankshaft pulley. It is essential to use counterhold - OE (205-072) here and loosen bolt of crankshaft pulley.
6. Remove lower timing belt guard (Fig. 8).
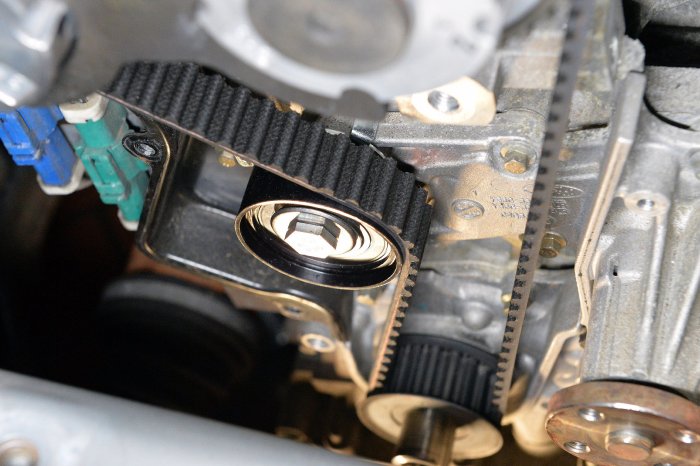
7. Loosen tensioning pulley bolt and release tension on timing belt/tensioning pulley until tensioning pulley fixing stud - OE (303-1054) can be inserted into tensioning pulley.
8. Timing belt can now be removed.
Installation - camshaft belt:
1. Check or reset valve timing settings in same way as for removal (items 1 to 4).
2. Fit new tensioning pulley and, if appropriate, new water pump.
3. Fit timing belt on exhaust camshaft sprocket, starting clockwise. Take care to ensure that timing belt is not kinked during fitting! Timing belt must be tight between sprockets on tight side!
4. Withdraw fixing stud from tensioning pulley.
5. Refit lower timing belt guard.
6. Fit crankshaft pulley using new bolt. Note: Two bolts of different lengths are available! Up to model 2005/08 M12x29 (40Nm+90°), from model 2005/09 M12x44.5 (40Nm+90°). You are recommended to check depth of threaded bore with suitable measuring tool to determine which new bolt to use since model year and day of registration can sometimes differ. Depth 42mm = M12x29mm; depth 52mm = M12x44.5mm. Use counterhold - OE (205-072)!
7. Remove locking tools.
8. Turn engine through two revolutions in direction of engine travel. Set engine to TDC cylinder 1. Insert camshaft locking tool and crankshaft locking tool. If locking tool cannot be inserted, correct valve timings. Check timing belt tension again.
9. Remove locking tools, screw cylinder block screw plug (20Nm) back into cylinder block. Remove holding tool and fit components in reverse order of removal.
10. Fitting: Timing belt guard (9Nm), water pump pulley (27Nm), change ancillary unit belt if it was cut. Use of ContiTech Elast Tool F01 and Uni Tool Elast is recommended for fitting elastic belts; engine mount bolts (to engine bracket 80Nm; to body 90Nm) and engine mount, engine compartment underpanel, front right wheel, engine compartment underpanel right.
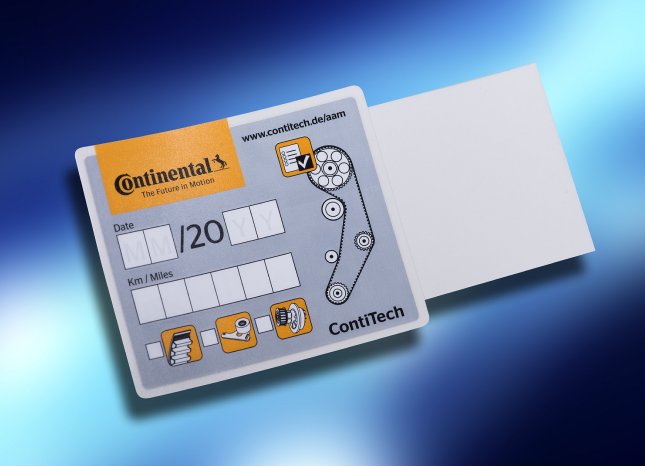
11. Record changing of original ContiTech timing belt on sticker supplied and stick this in engine compartment (Fig. 9).
Then carry out a test run or test drive.
